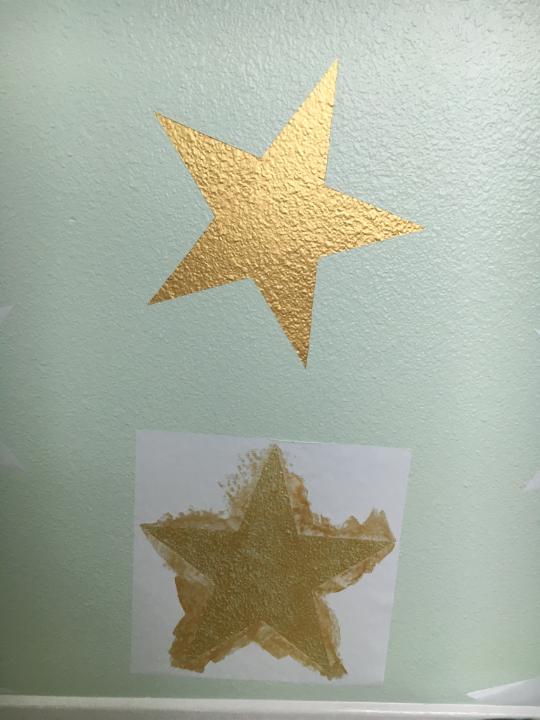
These amazing hand-painted gold stars, contrasted against Light Mint (Benjamin Moore), are the starting point for a Whimsical Woodland themed nursery for a little girl. I love that the mom-to-be (MTB) choose unexpected mint-green for her daughter's nursery. The nursery is in progress, but I'm infatuated with these stars and just had to share (stay tuned for an update on the finished nursery). For the step by step tutorial on the stars, see below.
But, first, here's the overall vision for the nursery. Whimsical Woodland foxes, feathers and arrows mixed with chevron graphics for a modern twist. See the full Pinterest mood board for the nursery at: https://www.pinterest.com/lilpavotcitron/as-nursery/
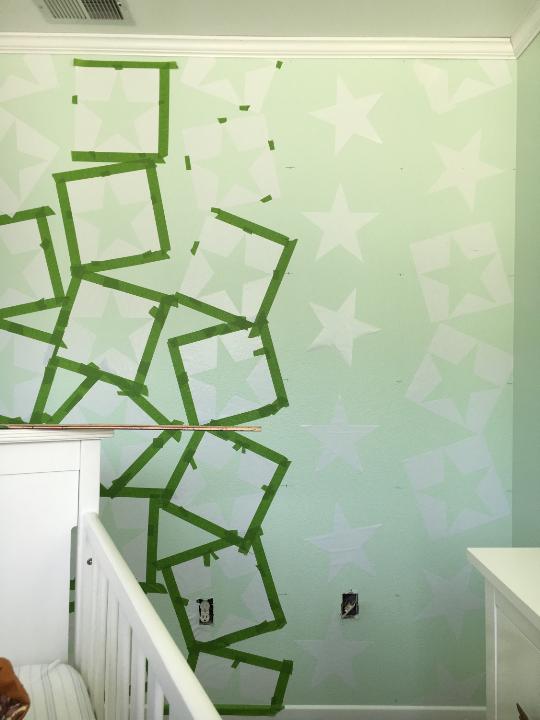
Inspired by this Sissy+Marley Lucky Star wallpaper but not wanting the permanency of wallpaper, the MTB (after much debate with the DTB) designed a strategy for painting crisp stars in an organized chaos pattern. Beginning with star stencils, the MTB layed out the stars in a grid pattern on the wall and then painstakingly painted each stenciled star. Disclaimer from the MTB, this project required a staggering amount of man hours.
To create your own starry room, here's what you'll need:
- Ralph Lauren Gold Regents Metallic Finish 1
- Star stencils (create your own out of contact paper)
- Green Frog tape
- Elmer's Glue or Mod Podge
- Yardstick
Step 1: Lay out the stencils on the wall using a yardstick to equally space the stars, and secure stencils to wall with painter's tape. (Hint - start in the middle of the wall and space outwards and stagger top star of each column, placing star at top of wall for every other column and placing star in the middle of the row for the next column)
Step 2: Seal interior edges of stencil with two coats of Elmer's glue or Mod Podge to ensure crisp painted stars. If using Elmer's glue, dilute with water so that the ratio is 3 parts glue, 1 part water. (Tip - Mod Podge is more expensive that Elmer's glue, which can be found at the Dollar Store)
Step 3: Using a mini rolling paintbrush, roll three coats of paint over the stenciled star outlined. (Hint - allow paint to dry at least 1-2 hours between coats)
Step 4: While the paint is damp, remove the stencil. Voila! Starry perfection. (Hint - allow paint to dry for 1 hour and use a razor blade to remove star-tips of stencil)
Stay tuned for pics of of the finished nursery.


